HAProxy 是一种免费、高效且可靠的解决方案, 可为基于 TCP 和 HTTP 的应用程序提供高可用性、负载均衡和代理功能。它特别适用于高流量的网站, 并为世界上许多访问量最大的网站提供支持
为了更好地支持 TLS 1.3, HAProxy 版本应使用 1.8.15 或更高版本, 同时 OpenSSL 的版本需要在 1.1.1 及以上。如果你当前的系统软件仓库中提供的版本较低, 需要通过编译安装的方式获取新版本
准备条件
- HAProxy 2.0.14
- OpenSSL 1.1.1g
- Lua 5.3.5
- zlib 通过系统软件仓库获取
- pcre 通过系统软件仓库获取
安装与编译依赖
安装开发工具与依赖库
yum groupinstall "Development Tools"
yum install -y pcre-devel zlib-devel bzip2-devel systemd-devel readline-devel gcc gcc-c++ make
创建 HAProxy 专属用户
useradd -s /sbin/nologin -M haproxy
安装依赖 OpenSSL 1.1.1g
# 下载并解压
wget https://www.openssl.org/source/openssl-1.1.1g.tar.gz
tar -xf openssl-1.1.1g.tar.gz
cd openssl-1.1.1g

# 编译并安装
less INSTALL
./config --prefix=/usr/local/openssl --openssldir=/usr/local/ssl
make
make test
make install

echo /usr/local/openssl/lib >> /etc/ld.so.conf.d/openssl.conf
ldconfig
/usr/local/openssl/bin/openssl version -a
安装依赖 Lua 5.3.5
# 下载并解压
wget http://www.lua.org/ftp/lua-5.3.5.tar.gz
tar -xf lua-5.3.5.tar.gz
cd lua-5.3.5

# 编译并安装
make linux
make install INSTALL_TOP=/usr/local/lua
安装 HAProxy 2.0.14
# 下载并解压
wget http://www.haproxy.org/download/2.0/src/haproxy-2.0.14.tar.gz
tar -xf haproxy-2.0.14.tar.gz
cd haproxy-2.0.14

# 编译并安装
make TARGET=linux-glibc PREFIX=/usr/local/haproxy USE_OPENSSL=1 USE_ZLIB=1 USE_PCRE=1 USE_SYSTEMD=1 SSL_INC=/usr/local/openssl/include SSL_LIB=/usr/local/openssl/lib USE_LUA=1 LUA_LIB=/usr/local/lua/lib/ LUA_INC=/usr/local/lua/include/

make install PREFIX=/usr/local/haproxy

/usr/local/haproxy/sbin/haproxy -vv
配置 HAProxy
创建配置文件目录和文件
mkdir /etc/haproxy
vim /etc/haproxy/haproxy.cfg
配置文件1: 基本 HTTP 配置
# 全局配置
global
    # 设置日志
    log 127.0.0.1 local3 info
    chroot /usr/local/haproxy
    # 用户与用户组
    user haproxy
    group haproxy
    # 守护进程启动
    daemon
    # 最大连接数
    maxconn 4000
# 默认配置
defaults
    log global
    mode http
    option httplog
    option dontlognull
    timeout connect 5000
    timeout client 50000
    timeout server 50000

listen stats
    bind 0.0.0.0:1080             # 监听端口
    stats refresh 30s             # 统计页面自动刷新时间
    stats uri /stats              # 统计页面 url
    stats realm Haproxy Manager   # 统计页面密码框上提示文本
    stats auth admin:admin        # 统计页面用户名和密码设置
    #stats hide-version           # 隐藏统计页面上 HAProxy 的版本信息

# 前端配置, http_front 名称可自定义
frontend http_front
    # 发起 http 请求到 80 端口, 会被转发到设置的 IP 及端口
    bind *:80
    # haproxy 的状态管理页面, 通过 /haproxy?stats 来访问
    stats uri /haproxy?stats
    default_backend http_back

# 后端配置, http_back 名称可自定义
backend http_back
    # 负载均衡方式
    # - source 根据请求源 IP
    # - static-rr 根据权重
    # - leastconn 最少连接者先处理
    # - uri 根据请求的 uri
    # - url_param 根据请求的 url 参数
    # - rdp-cookie 据据 cookie (name) 来锁定并哈希每一次请求
    # - hdr(name) 根据 HTTP 请求头来锁定每一次 HTTP 请求
    # - roundrobin 轮询方式
    balance roundrobin
    # 设置健康检查页面
    option httpchk GET /index.html
    # 传递客户端真实 IP
    option forwardfor header X-Forwarded-For
    # inter 2000 健康检查时间间隔 2 秒
    # rise 3 检测多少次才认为是正常的
    # fall 3 失败多少次才认为是不可用的
    # weight 30 权重
    # 需要转发的 IP 及端口
    server node1 192.168.0.4:80 check inter 2000 rise 3 fall 3 weight 30
    server node2 192.168.0.5:80 check inter 2000 rise 3 fall 3 weight 30
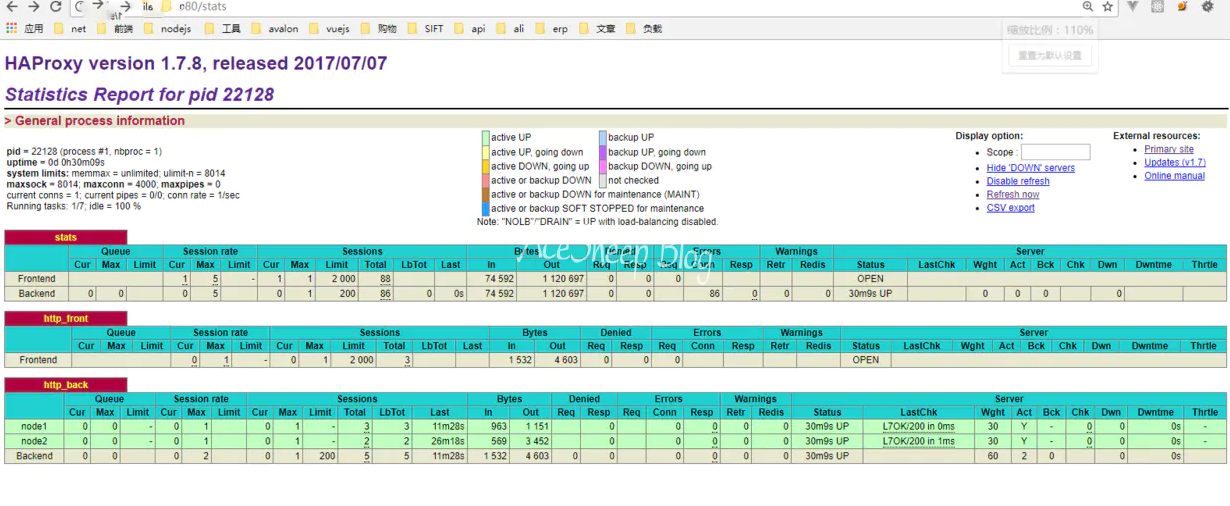
配置文件2: 仅状态页面
# 全局设置
global
    # 以后台进程运行
    daemon
    user haproxy
    # 用户与用户组
    group haproxy
    # 每个进程的最大连接数
    maxconn 3500
    # 进程数, 该值可以设置小于或等于 cpu 核心数
    # balance roundrobin   负载均衡轮询方式
    # balance source       负载均衡类似 nginx 的 ip_hash
    # balance leastconn    负载均衡最小连接
    nbproc 1

# 默认设置
defaults
    # 设置 http (七层模式), 也可设置为 tcp (四层模式)
    # 另外还有一个 Health 健康监测模式
    # 对 mysql 进行负载均衡的话, 这里记得修改为 tcp
    mode http
    timeout connect 5000ms
    timeout client 50000ms
    timeout server 50000ms

# 配置 haproxy 管理页面
listen admin_stats
    # 访问端口为 9999
    bind *:9999
    mode http
    # 继承 global 中 log 的定义
    log global
    # 自动刷新时间
    stats refresh 30s
    # 路径为 status, ip+端口+路径即可访问
    stats uri /status
    # 配置管理用户账号密码
    stats auth admin:admin
    # 设置统计页面认证时的提示内容
    stats realm Private lands
    stats admin if TRUE
    # 隐藏统计页面上的 haproxy 版本信息
    stats hide-version
配置文件3: 带状态页面与负载均衡
# 全局配置
global
    # 配置全局日志记录
    # local0 为日志设备
    # notice 为输出的日志级别
    # 127.0.0.1 表示使用本地机器上的 rsyslog 服务中的 local0 设备记录日志等级为 notice 的日志
    # log loghost local0 info 定义 haproxy 日志级别
    log 127.0.0.1 local0 notice
    # 工作目录
    #chroot /usr/local/haproxy-1.5.15
    # 创建 1 个进程进入 deamon 模式运行, 以后台形式运行 harpoxy
    daemon
    # 用户与用户组
    user haproxy
    group haproxy
    # 可以接收的最大并发连接数
    maxconn 20480
    # haproxy 进程 PID 文件
    pidfile /var/run/haproxy.pid

defaults
    # 所处理的类别, tcp 是四层, http 是七层, health 只会返回 OK, 若是混合模式则 mode 不需要设置
    mode http
    # 定义日志, 采用全局定义
    log global
    # 不记录健康检查的日志信息
    option dontlognull
    # 每次请求完毕后主动关闭 http 通道
    option httpclose
    # 日志类别为 http 日志格式
    # 如果是混合模式, 此处还需要加上 tcpclog
    option httplog
    # 后端服务器可以从 Http Header 中获得客户端 IP
    #option forwardfor
    # serverId 对应的服务器挂掉后, 强制定向到其他健康的服务器
    option redispatch
    # 设置默认负载均衡方式, 轮询方式
    balance roundrobin
    # 连接超时
    timeout connect 10s
    # 客户端连接超时
    timeout client 10s
    # 服务器连接超时
    timeout server 10s
    # 健康检测的超时时间
    timeout check 10s
    # 最大连接数
    maxconn 60000
    # 3 次连接失败就为服务不可用
    retries 3

# 统计页面配置
# 为 haproxy 访问状态监控页面配置, 取名为 admin_stats
listen admin_stats
    # 监听端口
    bind 0.0.0.0:8189
    # 启用监听端口
    stats enable
    # http 的 7 层模式
    mode http
    # 继承 global 中 log 的定义
    log global
    # 页面自动刷新时间 30s
    stats refresh 30s
    # 监控页面的 url 访问路径, 即 http://ip/stats 访问监控页面
    stats uri /stats
    # 监控页面的用户和密码 admin, 可以设置多个用户名
    stats auth admin:admin
    # 监控页面的密码框提示信息
    stats realm Haproxy Statistics
    # 隐藏统计页面上 HAProxy 的版本信息
    stats admin if TRUE
    #stats hide-version
    # 当通过认证才可管理

# web 设置
# 定义 webcluster 服务器组
listen webcluster
    # 定义 haproxy 前端部分监听的端口
    bind 0.0.0.0:81
    # http 的 7 层模式
    mode http
    # 心跳检测 7 层访问
    #option httpchk GET /index.html
    # 继承 global 中 log 的定义
    log global
    # server 进程可接受的最大并发连接数
    maxconn 3000
    # 负载均衡的方式: 轮询
    balance roundrobin
    # 根据 cookie 轮询
    cookie SESSION_COOKIE insert indirect nocache
    server web01 10.6.76.27:1988 check inter 2000 fall 5
    server web02 10.6.76.28:1988 check inter 2000 fall 5
    #server web01 192.168.80.102:80 cookie web01 check inter 2000 fall 5
    #server web02 192.168.80.103:80 cookie web01 check inter 2000 fall 5
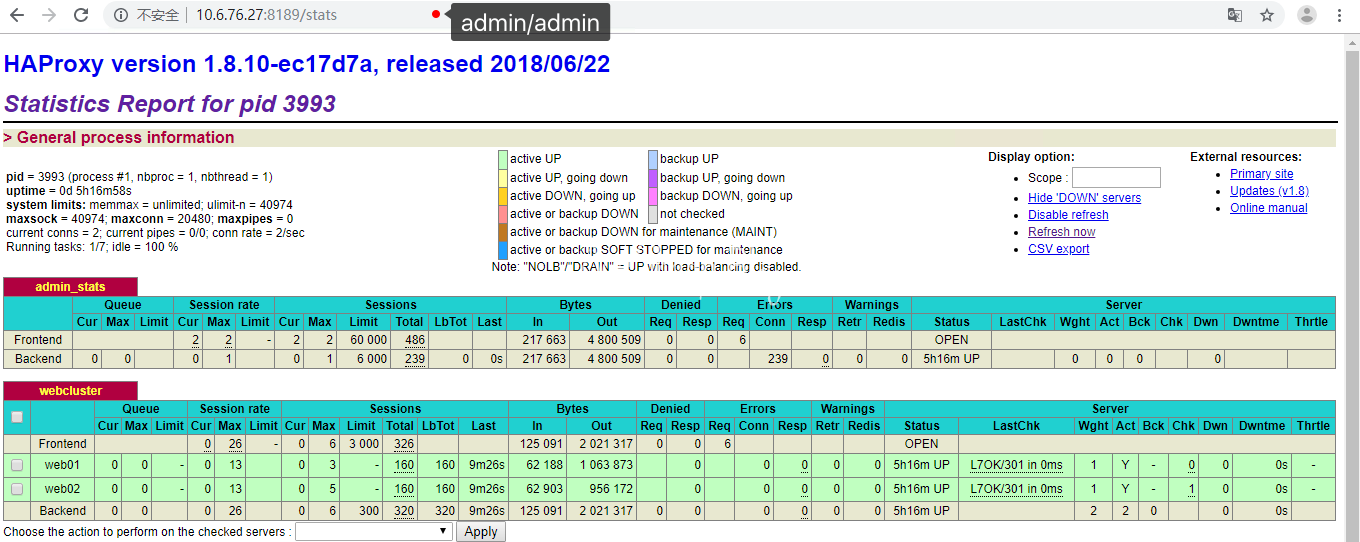
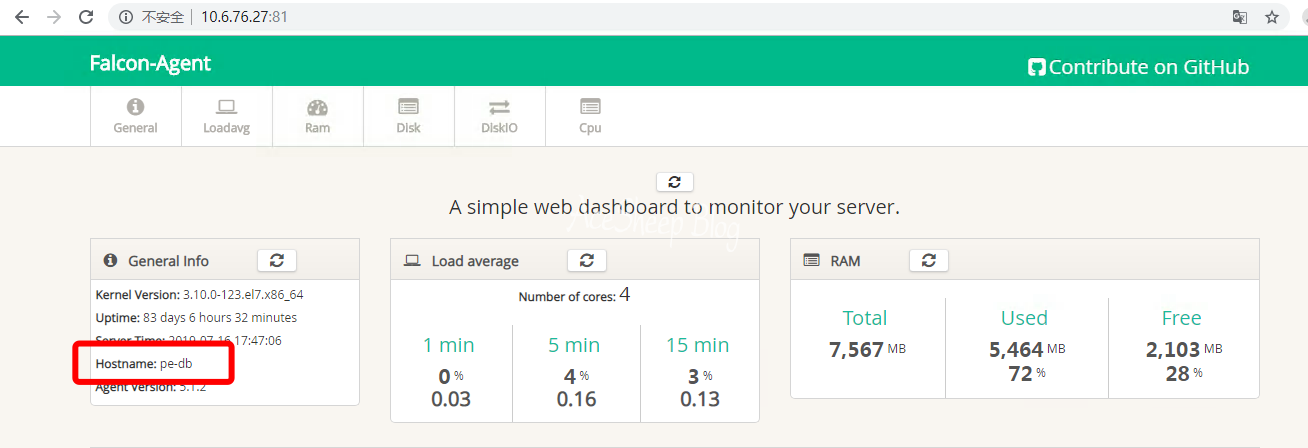
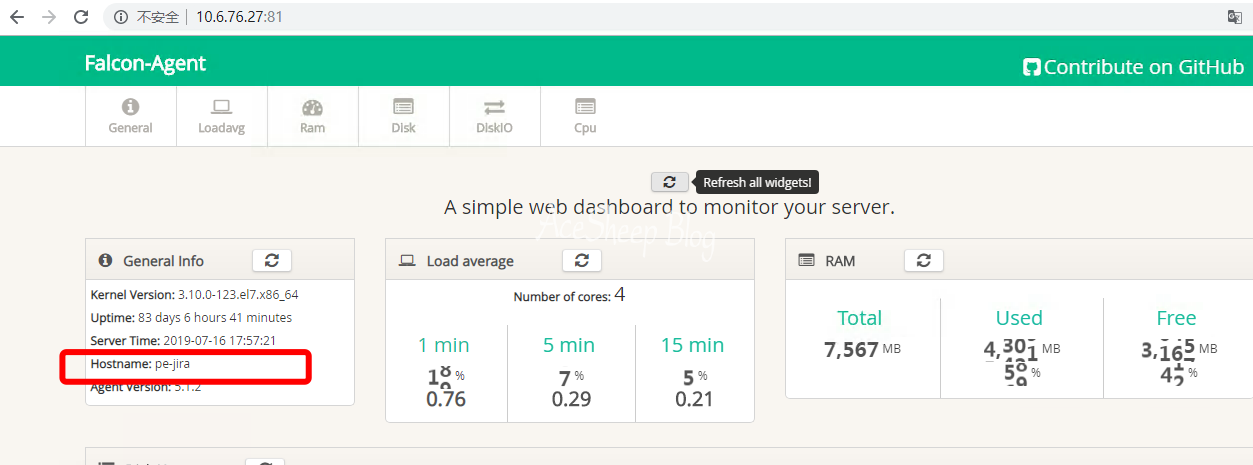
配置文件4: TCP + TLS + Web
这是我使用的配置文件, TCP + TLS + Web 方案
global
    log /dev/log local0
    log /dev/log local1 notice
    chroot /usr/local/haproxy
    #stats socket /run/haproxy/admin.sock mode 660 level admin expose-fd listeners
    #stats timeout 30s
    user haproxy
    group haproxy
    daemon
    ca-base /etc/ssl/certs
    crt-base /etc/ssl/private

    # 仅使用支持 FS 和 AEAD 的加密套件
    ssl-default-bind-ciphers ECDHE-ECDSA-AES128-GCM-SHA256:ECDHE-RSA-AES128-GCM-SHA256:ECDHE-ECDSA-AES256-GCM-SHA384:ECDHE-RSA-AES256-GCM-SHA384:ECDHE-ECDSA-CHACHA20-POLY1305:ECDHE-RSA-CHACHA20-POLY1305:DHE-RSA-AES128-GCM-SHA256:DHE-RSA-AES256-GCM-SHA384
    ssl-default-bind-ciphersuites TLS_AES_128_GCM_SHA256:TLS_AES_256_GCM_SHA384:TLS_CHACHA20_POLY1305_SHA256
    # 禁用 TLS 1.2 之前的 TLS
    ssl-default-bind-options no-sslv3 no-tlsv10 no-tlsv11

    tune.ssl.default-dh-param 2048

defaults
    log global
    # 我们需要使用 tcp 模式
    mode tcp
    option dontlognull
    timeout connect 5s
    # 空闲连接等待时间, 这里使用与 V2Ray 默认 connIdle 一致的 300s
    timeout client  300s
    timeout server  300s

listen stats
    # 监听端口
    bind 0.0.0.0:1080
    stats enable
    mode http
    # 统计页面自动刷新时间
    stats refresh 30s
    # 统计页面 url
    stats uri /stats
    # 统计页面密码框上提示文本
    stats realm Haproxy Manager
    # 统计页面用户名和密码设置
    stats auth admin:admin

frontend tls-in
    # 监听 443 tls, tfo 根据自身情况决定是否开启, 证书放置于 /etc/ssl/private/example.com.pem
    bind *:443 tfo ssl crt /root/com.pem
    tcp-request inspect-delay 5s
    tcp-request content accept if HTTP
    # 将 HTTP 流量发给 web 后端
    use_backend web if HTTP
    # 将其他流量发给 vmess 后端
    default_backend vmess

backend web
    server server1 127.0.0.1:8080

backend vmess
    server server1 127.0.0.1:40001
运行与测试
测试配置文件
/usr/local/haproxy/sbin/haproxy -c -f /etc/haproxy/haproxy.cfg
启动 HAProxy
/usr/local/haproxy/sbin/haproxy -f /etc/haproxy/haproxy.cfg
访问 Web UI 状态页面
http://<your-ip>:1080/stats
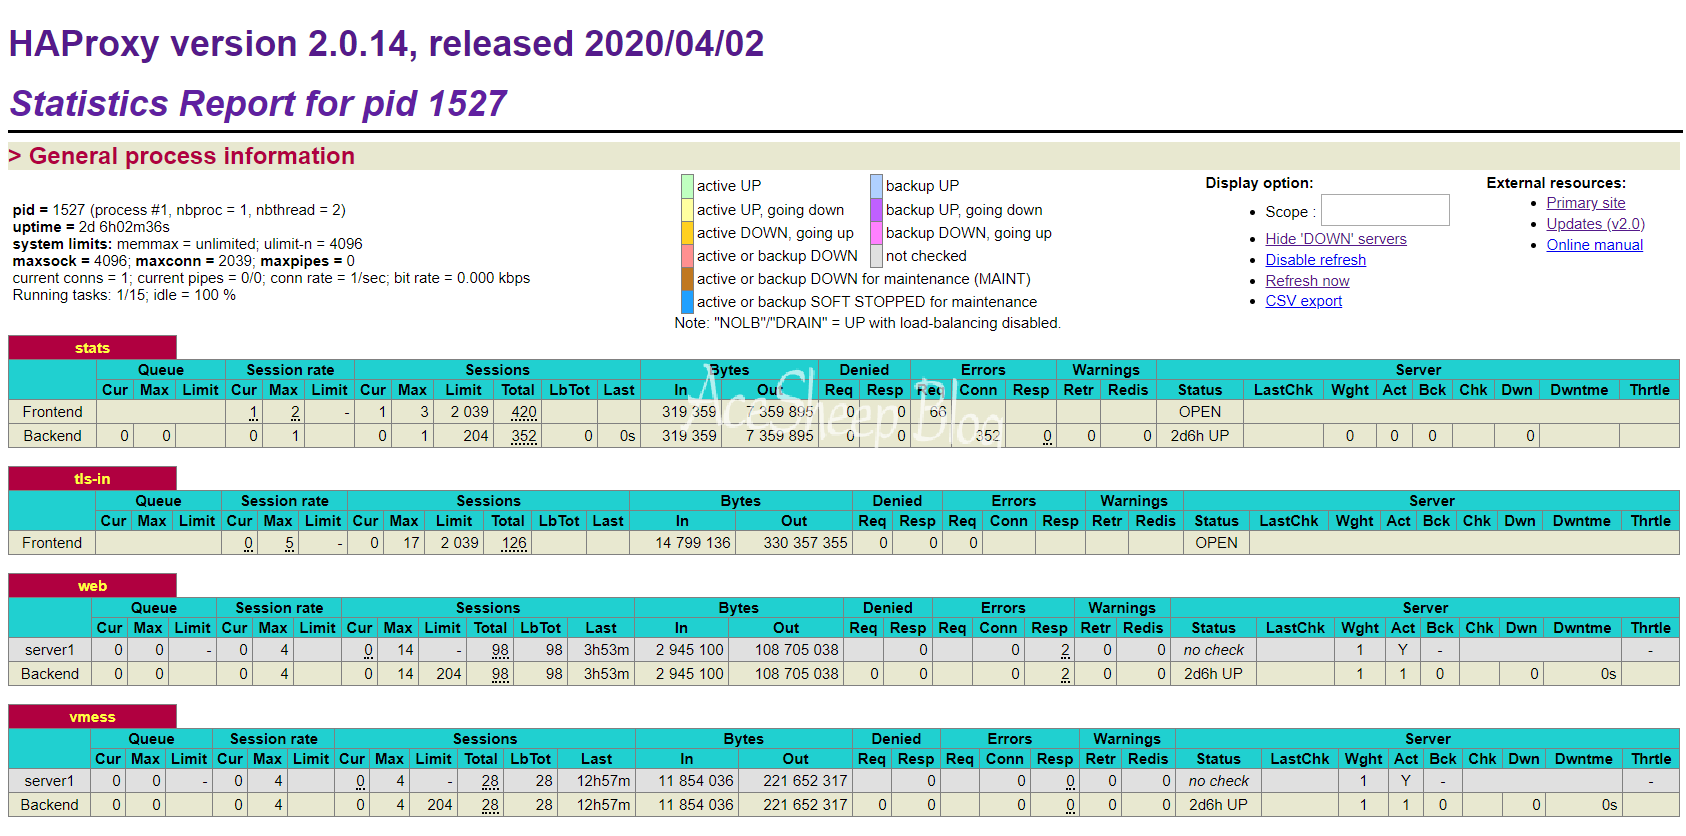
设置系统服务
创建服务文件
创建 HAProxy 的 systemd 服务文件, 编辑文件 /lib/systemd/system/haproxy.service
[Unit]
Description=Haproxy Service
After=syslog.target network.target

[Service]
Type=forking
ExecStart=/usr/local/haproxy/sbin/haproxy -f /etc/haproxy/haproxy.cfg
# ExecReload=/bin/kill -USR2 $MAINPID
ExecReload=/usr/local/haproxy/sbin/haproxy -f /etc/haproxy/haproxy.cfg -sf $(cat /var/run/haproxy.pid)
# ExecStop=cd&&/usr/local/haproxy/sbin/&&pkill haproxy
KillMode=mixed
Restart=always

[Install]
WantedBy=multi-user.target
创建软连
ln -s /lib/systemd/system/haproxy.service /etc/systemd/system/multi-user.target.wants/haproxy
常用命令
# 重新载入配置文件
systemctl daemon-reload

# 启动 haproxy
systemctl start haproxy

# 停止 haproxy
systemctl stop haproxy

# 开机启动
systemctl enable haproxy
查看 haproxy 是否运行
ps -ef | grep haproxy

haproxy   74886      1  0 07:59 ?        00:00:00 /usr/local/haproxy/sbin/haproxy -f /usr/local/haproxy/haproxy.cfg
haproxy   74948      1  0 08:00 ?        00:00:00 /usr/local/haproxy/sbin/haproxy -f /usr/local/haproxy/haproxy.cfg
root      74965  74037  0 08:03 pts/2    00:00:00 grep --color=auto haproxy
原文
centos7下haproxy2.0加lua编译安装并加入系统启动
Haproxy在centos7下的安装及配置
centos7编译安装haproxy